A TSM storage agent can become disabled if there is greater than 60 minutes of difference in time between the TSM storage agent machine and TSM server machine. When an administrator session initiates with the storage agent, this time difference will cause the storage agent to disable itself.
When routing an administration command to the storage agent, such as QUERY SESSION or QUERY MOUNT, the ANR0110E error message is witnessed in the server activity log. After changing the time difference between the TSM storage agent and TSM server to less than 60 minutes, and then issuing ACCEPT DATE on the TSM server, the storage agent disables itself. This can be observed by issuing the QUERY STATUS command on the storage agent console and checking for the availability parameter value, which should say 'disabled.'
Since the storage agent is unsure about the time, it has disabled itself. Any subsequent storage agent requests will fail. Recycling the storage agent will cause it to become available for use again.
For the PDF version of this document, send a blank email, with subject line "Storage Agent disabled with error ANR0110E due to Time Differences", to TSM Assist
Wednesday, July 29, 2009
Tuesday, July 28, 2009
System date/time change causes ANR0110E unexpected date sessions disabled
Every time the server is started and for each hour thereafter, a date and time check occurs. An invalid date can be one of the following:
• Earlier than the server installation date and time.
• More than one hour earlier than the last time the date was check
• More than 30 days later than the last time the date was checked.
As a preventive measure, when TSM detects an invalid date or time, server sessions become disabled so that the TSM server does not perform undesired actions based on the new system date/time. For example, expiration processing uses the system date/time to determine when to purge files from server storage.
An error message (ANR0110E) is displayed and expiration, migration, reclamation, and volume history deletion operations are not allowed. You may either change the system date if it is in error, or issue the ACCEPT DATE command to force the server to accept the current system date as valid. Use the ENABLE SESSIONS command after you issue the ACCEPT DATE command to re-enable the server for client node activity.
In order to correct this problem, perform the following commands on the TSM server:
• Run the QUERY STATUS command and check for the availability parameter value, which should say 'disabled'
• Run the ACCEPT DATE command, which tells the TSM Server that you are aware of and accept the date/time change.
• Run the ENABLE SESSIONS command, which re-enables the TSM Server again for normal operations.
• Re-run the QUERY STATUS command and check for the availability parameter value, which should say 'enabled'
For the PDF version of this document, send a blank email, with subject line "System date/time change causes ANR0110E unexpected date sessions disabled", to TSM Assist
Tuesday, July 7, 2009
Creating Multiple TSM Instances in a UNIX Environment
Note:
This exercise assumes that the platform is SuSE Linux Enterprise Server.
This will work well on other UNIX environments – Solaris/HP/AIX.
For AIX, change all references from /opt/tivoli to /usr/tivoli.
This exercise assumes that the platform is SuSE Linux Enterprise Server.
This will work well on other UNIX environments – Solaris/HP/AIX.
For AIX, change all references from /opt/tivoli to /usr/tivoli.
To run multiple Tivoli Storage Manager servers on the same machine, you must create unique port numbers TCPPORT, HTTPPORT, SHMPORT and TCPADMINPORT and maintain database and recovery log files that are separate to each TSM server instance. Each server instance needs its own ports and its own database and recovery log.
Take note that you need a separate license for each unique instance of the server in order to run additional servers.
When running multiple servers, note that running a server from a directory other than the installation directory is only supported by setting the DSMSERV_DIR environment variable. This is because the base install directory is used for more than just finding the executables; e.g. the license and message file. To run a server from a directory other than the installation directory, you set the DSMSERV_DIR environment variable to point to the installation directory and add /opt/tivoli/tsm/server/bin to your path.
This exercise assumes that both servers will be using the same IP address and clients will be connecting to both servers. In order to set this up, two unique TCPPORTS and HTTPPORTS must be used in the dsmserv.opt. Otherwise the ports will not be open for connection when both servers are running, because the server that starts up first claims the port and the port will be bound to that server.
The TSM server software code is installed in /opt/tivoli/tsm/server/bin. The same executable, but different TSM Disk Definition – dsmserv.dsk, TSM Server Options – dsmserv.opt, Volume History and Device Configuration files will be used in each instance. This exercise assumes that the user will be keeping a set of these files for one instance in /opt/tivoli/tsm/server_A and in /opt/tivoli/tsm/server_B for the other. However, any filesystem can be used.
From here on, assume that server_A is the default installed TSM environment and that server_b is to be created.
The following steps can then be implemented:
For server_A:
1. After halting server_A, change to the server_A instance directory.
cd /opt/tivoli/tsm/server_A
2. Edit’s its dsmserv.opt file (the bare minimum setup below):
commmethod tcpip
tcpport 1500
commmethod http
httpport 1520
devconfig devcfg_serverA.out
volhist volhist_serverA.out
3. server_A can be started up by using
3.1 The –o parameter of the dsmserv command to specify an options file name.
3.2 The following command if your shell is in the csh family:
setenv DSMSERV_DIR /opt/tivoli/tsm/server/bin
setenv DSMSERV_CONFIG=/opt/tivoli/tsm/serverA /dsmserv.opt
nohup /opt/tivoli/tsm/server/bin/dsmserv quiet &
3.3 The following command if your shell is in the ksh family:
export DSMSERV_DIR=/opt/tivoli/tsm/server/bin
export DSMSERV_CONFIG=/opt/tivoli/tsm/serverA/dsmserv.opt
nohup /opt/tivoli/tsm/server/bin/dsmserv quiet &
For server_b:
1. Change to the server_B instance directory.
cd /opt/tivoli/tsm/server_B
2. Edit’s its dsmserv.opt file (the bare minimum setup below):
commmethod tcpip
tcpport 1501
commmethod http
httpport 1521
devconfig devcfg_serverB.out
volhist volhist_serverB.out
3. Format the database and recovery logs files. For example, to format two 10 GB database volume and a 1 GB recovery log volume, enter:
dsmfmt –g –db server_B_dbvol1.dsm 10 server_B_dbvol2.dsm 10
dsmfmt –g –log server_B_logvol1.log 1
4. Initialize the database and recovery log in the new server directory:
dsmserv format 1 server_B_logvol1.log 2 server_B_dbvol1.dsm server_B_dbvol2.dsm
5. When the server is started, it searches the current directory for the existence of the dsmserv.dsk file. If the file is found, the names of the recovery log and database files are used for server operation. If the dsmserv.dsk file is not found in the current directory, Tivoli Storage Manager issues an error message (ANR0212E) and server initialization stops.
6. Create server_B’s dsmserv.dsk file with contents as follows:
/opt/tivoli/tsm/server_B/server_B_logvol1.log
/opt/tivoli/tsm/server_B/server_B_dbvol1.dsm
/opt/tivoli/tsm/server_B/server_B_dbvol2.dsm
7. The TSM lock management process creates the adsmserv.lock file in the same directory as the dsmserv command. If the adsmserv.lock file is unable to be created, locked or written to, the message indicates the server is already running. To allow for the creation of a second lock file, create a soft link in server_B’s instance directory to the dsmserv command.
ln –s /opt/tivoli/tsm/server/bin/dsmserv /opt/tivoli/tsm/server_B/dsmserv
8. server_B can be started up by using
8.1 The –o parameter of the dsmserv command to specify an options file name.
8.2 The following command if your shell is in the csh family:
setenv DSMSERV_DIR /opt/tivoli/tsm/server/bin
setenv DSMSERV_CONFIG=/opt/tivoli/tsm/serverB/dsmserv.opt
nohup /opt/tivoli/tsm/server/bin/dsmserv quiet &
8.3 The following command if your shell is in the ksh family:
export DSMSERV_DIR=/opt/tivoli/tsm/server/bin
export DSMSERV_CONFIG=/opt/tivoli/tsm/serverB/dsmserv.opt
nohup /opt/tivoli/tsm/server/bin/dsmserv quiet &
9. You will also want to use the SET SERVERNAME to give each server instance a unique name in order to be able to manage these multiple TSM servers from the same ISC/Admin Center interface at 5.3 - if the multiple servers all have the same servername, then you will not be able to create a unique Admin Center connection to each of these servers while they are running on the same system. Furthermore, you may also want to set each servers internal name to something other than the defaults (the system name) for to make it easier to differentiate which one you are working on. This must be done before any device paths or server to server communication is configured.
Wednesday, July 1, 2009
ANR2400E During del volhist, when volume is of type REMOTE
ANR2400E is reported when running del volhist for volume of type=remote. This volume has already been defined in a storage pool or has been used previously to store export, database dump, or database backup information; or this volume may be owned by a library client or another TSM server.
TSM is not able to delete these volumes using the del volhist command. The volumes will never return to scratch.
This can be fixed by issuing the following command:
del volh tod=today type=remote volume=<VOLUME_NAME> force=y
This should only be used if a REMOTE volume no longer has valid data on it. Once executed, any server could use the volume to overwrite any existing data. Use caution whenever you delete any volume history entry.
For the PDF version of this document, send a blank email, with subject line "ANR2400E During del volhist, when volume is of type REMOTE", to TSM Assist
Wednesday, June 10, 2009
TDP for MSSQL receives error ACO5716W, rc=406
When trying to run a Data Protection for SQL command, the following message is received: ACO5716W An error was encountered with Tivoli Storage Manager API initialization, rc = 406.
For example:
C:\Program Files\Tivoli\TSM\TDPSql>tdpsqlc backup * full
IBM Tivoli Storage Manager for Databases:
Data Protection for Microsoft SQL Server Version 5, Release 1, Level 5.0
(C) Copyright IBM Corporation 1997, 2002. All rights reserved.
ACO5716W An error was encountered with Tivoli Storage Manager API initialization, rc = 406.
Or, from within the TDP for SQL GUI:
This error can occur when the base-level TSM BA client is upgraded to a newer version. In certain situations, the TSM API runtime files get out of sync. This issue was solved by (un)installing all the TSM components in this order:
1. Uninstall Data Protection for SQL.
2. Uninstall the base-level TSM BA client.
3. Reinstall the base-level TSM BA client.
4. Reinstall Data Protection for SQL.
5. Retry the operation.
For the PDF version of this document, send a blank email, with subject line "TDP for MSSQL receives error ACO5716W, return code 406", to TSM Assist
For example:
C:\Program Files\Tivoli\TSM\TDPSql>tdpsqlc backup * full
IBM Tivoli Storage Manager for Databases:
Data Protection for Microsoft SQL Server Version 5, Release 1, Level 5.0
(C) Copyright IBM Corporation 1997, 2002. All rights reserved.
ACO5716W An error was encountered with Tivoli Storage Manager API initialization, rc = 406.
Or, from within the TDP for SQL GUI:

This error can occur when the base-level TSM BA client is upgraded to a newer version. In certain situations, the TSM API runtime files get out of sync. This issue was solved by (un)installing all the TSM components in this order:
1. Uninstall Data Protection for SQL.
2. Uninstall the base-level TSM BA client.
3. Reinstall the base-level TSM BA client.
4. Reinstall Data Protection for SQL.
5. Retry the operation.
For the PDF version of this document, send a blank email, with subject line "TDP for MSSQL receives error ACO5716W, return code 406", to TSM Assist
Monday, June 8, 2009
TDP for MSSQL receives error ACO5716W, rc=610
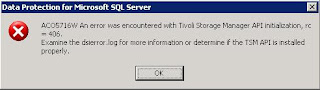
When trying to run a Data Protection for SQL command, the following message is received: ACO5716W An error was encountered with Tivoli Storage Manager API initialization, rc = 610.
For example:
C:\Program Files\Tivoli\TSM\TDPSql>tdpsqlc backup * full
IBM Tivoli Storage Manager for Databases:
Data Protection for Microsoft SQL Server Version 5, Release 1, Level 5.0
(C) Copyright IBM Corporation 1997, 2002. All rights reserved.
ACO5716W An error was encountered with Tivoli Storage Manager API initialization, rc = 610.
The TDP for SQL GUI will fail to open with the above error.
The return code of 610 means "DSM_RC_NLS_OPEN_TXT", a failure to open a message repository. In this case, a file is missing from the API and TDP for SQL directories called dscenu.txt - in some instances, TDP for SQL will be missing this file when installed.
The file "dscenu.txt" will also be found in the baclient directory (by default, c:\Program Files\Tivoli\TSM\Baclient) - copying this file into the API directory (by default, c:\Program Files\Tivoli\TSM\API) and into the TDP for SQL directory (by default, c:\Program Files\Tivoli\TSM\TDPSql) will allow the TDP for SQL GUI to see the message repository and open properly.
For the PDF version of this document, send a blank email, with subject line "TDP for MSSQL receives error ACO5716W, return code 610", to TSM Assist
Sunday, June 7, 2009
TDP for MSSQL receives error ACO0004E
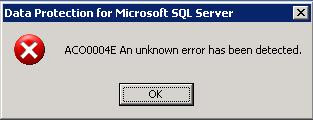
When trying to run a Data Protection for SQL command, the following message is received: ACO0004E An unknown error has been detected.
For example:
C:\Program Files\Tivoli\TSM\TDPSql>tdpsqlc backup * full
IBM Tivoli Storage Manager for Databases:
Data Protection for Microsoft SQL Server Version 5, Release 1, Level 5.0
(C) Copyright IBM Corporation 1997, 2002. All rights reserved.
ACO0004E An unknown error has been detected.
Or, from within the TDP for SQL GUI:
This error can occur when the base-level TSM BA client is upgraded to a newer version. In certain situations, the TSM API runtime files get out of sync. This issue was solved by (un)installing all the TSM components in this order:
1. Uninstall Data Protection for SQL.
2. Uninstall the base-level TSM BA client.
3. Reinstall the base-level TSM BA client.
4. Reinstall Data Protection for SQL.
5. Retry the operation.
For the PDF version of this document, send a blank email, with subject line "TDP for MSSQL receives error ACO0004E", to TSM Assist
For example:
C:\Program Files\Tivoli\TSM\TDPSql>tdpsqlc backup * full
IBM Tivoli Storage Manager for Databases:
Data Protection for Microsoft SQL Server Version 5, Release 1, Level 5.0
(C) Copyright IBM Corporation 1997, 2002. All rights reserved.
ACO0004E An unknown error has been detected.
Or, from within the TDP for SQL GUI:

This error can occur when the base-level TSM BA client is upgraded to a newer version. In certain situations, the TSM API runtime files get out of sync. This issue was solved by (un)installing all the TSM components in this order:
1. Uninstall Data Protection for SQL.
2. Uninstall the base-level TSM BA client.
3. Reinstall the base-level TSM BA client.
4. Reinstall Data Protection for SQL.
5. Retry the operation.
For the PDF version of this document, send a blank email, with subject line "TDP for MSSQL receives error ACO0004E", to TSM Assist
Friday, May 15, 2009
Enabling Backup/Archive Statistics and Logging
Enable the processing of all events to the TSM server activity log.
en ev actlog all node=*
Start logging events to the all receivers - and this includes the TSM server activity log.
beg ev all
Adjust the length of time that the activity log retains messages to avoid insufficient or outdated data. Here we set the activity log retention set to 180 days for management by date to 180 days
s actl 180 m=d
The SQL activity summary table contains statistics about each client session and server processes. These statistics are reflected in the daily report produced by Operational Reporting. Adjust the length of time that TSM retains these statistics. Here we set the server to retain the SQL activity summary table information for 60 days.
s sum 60
Using the undocumented server option CLIENTSUMMARYSTATISTICS OFF in the dsmserv.opt file will prevent clients from logging events to the summary table.
The event retention period for event records in the server database allows you to monitor completed schedules. An event record is created whenever processing of a scheduled command is started or missed. You can adjust the length of time that the server maintains event information to avoid insufficient or outdated data. Here we set the event retention period to 180 days.
s ev 180
Issue the QUERY STATUS command and verify the Activity Summary Retention Period, Event Record Retention Period and the Activity Summary Retention Period values.
Extracting a list of failed files from the Activity Log
Enable the processing of all events to the TSM server activity log.
en ev actlog all node=*
Start logging events to the all receivers - and this includes the TSM server activity log.
beg ev all
Adjust the length of time that the activity log retains messages to avoid insufficient or outdated data. Here we set the activity log retention set to 180 days for management by date.
s actl 180 m=d
To display all client originating failure messages, run:
select nodename, date(date_time) as DATE, time(date_time) as TIME, msgno, message from actlog where originator='CLIENT' and severity='E' order by 1,2
As of TSM Server 3.7, the DateFormat option in the Server Options file has been deprecated. The date format is now governed by the Locale in which the TSM server is running.
Note that TSM keeps only one version of an event record in the database. If a client schedule is changed, all previous event records for that schedule are removed from the database.
Monday, May 11, 2009
SCRATCH volumes become PRIVATE when checked in
After volumes were checked in the library as SCRATCH, TSM changed their status to PRIVATE.
Inspect the activity log for ANR8356E and ANR8778W.
q ac s=ANR8356E
q ac s=ANR8778W
If you have surpassed your activity log retention period, the SELECT statement below will identify these tapes.
select volume_name from libvolumes where status='Private' and last_use is Null and volume_name not in (select volume_name from volumes) and volume_name not in (select volume_name from volhistory where type in ('BACKUPFULL', 'BACKUPINCR', 'DBSNAPSHOT', 'DBDUMP'))
This situation typically happens when volumes were previously labelled in a different TSM server; or when a tape what should have been checked in as SCRATCH is checked in as PRIVATE.
The resolution is to check in the volumes using the following command:
label libv <LIBR_NAME> labels=b search=b checkin=scr overwrite=y waitt=0
Thursday, April 23, 2009
Finding ‘lost’ Tape Volumes
The DELETE VOLHISTORY command deletes volume history file records that are no longer needed (for example, records for obsolete database backup volumes).
When you delete records for volumes that are not in storage pools (for example, database backup or export volumes), the volumes return to scratch status if TSM acquired them as scratch volumes. Scratch volumes of device type FILE are deleted. When you delete the records for storage pool volumes, the volumes remain in the TSM database.
For users of DRM, the database backup expiration should be controlled with the SET DRMDBBACKUPEXP command instead of this DELETE VOLHISTORY command. Using the DELETE VOLHISTORY command removes TSM's record of the volume. This can cause volumes to be lost that were managed by the MOVE DRMEDIA command. The following bash script identifies these volumes:
#!/bin/bash
# --------------------------------------------------------
#
# Description: 'Missing Tapes' volumes.
# Date: 29th March 2007
# Queries: A Singh - singh.ajith@gmail.com
#
# --------------------------------------------------------
# Update this with the highest value of the volume labels.
MAX_VOLUMES=1300
# Update this with the lowest value of the volume labels.
MIN_VOLUMES=1000
# --------------------------------------------------------
# Tape Label Parameters - update as necessary
PREFIX="BL"
SUFFIX="L3"
# length of label excluding PREFIX and SUFFIX
LABEL_LENGTH=4
ZERO="0"
# --------------------------------------------------------
# TSM Server administrator account details - update as necessary
DSM_DIR=/opt/tivoli/tsm/client/ba/bin
DSM_ADMIN=admin
DSM_PWD=secret
DSM_CMD="$DSM_DIR/dsmadmc -id=$DSM_ADMIN -pa=$DSM_PWD -datao=y"
# --------------------------------------------------------
test -x $DSM_DIR/dsmadmc { echo "TSM Client Administrative CLI not installed."; if [ "$1" = "stop" ]; then exit 0; else exit 5; fi }
DATA_VOLS_SQL="select volume_name from volumes order by 1 asc"
VOLH_SQL="select volume_name from volhistory order by 1 asc"
LIBVOLS_SQL="select volume_name from libvolumes order by 1 asc"
MISSING_VOLS=" "
DATA_VOLS=`$DSM_CMD $DATA_VOLS_SQL`
VOLH_VOLS=`$DSM_CMD $VOLH_SQL`
LIB_VOLS=`$DSM_CMD $LIBVOLS_SQL`
DSM_VOLS=`echo $DATA_VOLS $VOLH_VOLS $LIB_VOLS sort uniq`
for (( i=$MIN_VOLUMES; i<=$MAX_VOLUMES; i++ )) do tmpvol="$i" for (( j=${#tmpvol}; j<$LABEL_LENGTH; j++ )); do tmpvol=$ZERO$tmpvol; done tmpvol=$PREFIX$tmpvol$SUFFIX MISSING_VOLS=" "$tmpvol$MISSING_VOLS done for i in $DSM_VOLS do MISSING_VOLS=`(for j in $MISSING_VOLS; do echo $j; done) grep -v $i` done echo "'MISSING' TAPE VOLUMES" echo "----------------------" echo echo "This is a list of tape volumes that are not in the tape libraries and are not listed in the volume history file and the TSM volumes list." echo echo $MISSING_VOLS tr [" "] ["\n"] # --------------------------------------------------------
Monday, April 20, 2009
Recovery Log Pinning
It is possible that the recovery log appears to be out of space when in fact it is being pinned by an operation or combination of operations on the server. A pinned recovery log is where space in the recovery log cannot be reclaimed and used by current transactions because an existing transaction is processing too slowly or is hung.
To determine if the recovery log is pinned, issue SHOW LOGPINNED repeatedly over many minutes. If this reports the same client session or server processes as pinning the recovery log, it may be necessary to take action to cancel or terminate that operation in order to keep the recovery log from running out of space.
To cancel or terminate a session or process that is pinning the recovery log, issue SHOW LOGPINNED CANCEL. Server version 5.1.7.0 and above as well as 5.2.0.0 and above have additional support for the recovery log to automatically recognize that the recovery log is running out of space and where possible to detect and resolve a pinned recovery log using the SHOW LOGPINNED processing.
For the PDF version of this document, send a blank email, with subject line "Recovery Log Pinning", to TSM Assist
Sunday, April 19, 2009
Delaying the Re-use of Tape Storage Pools
The REUSEDELAY attribute of a sequential access (tape or file disk pools) storage pool the number of days that must elapse before a volume can be reused or returned to scratch status, after all files have been expired, deleted, or moved from the volume.
When you delay reuse of such volumes and they no longer contain any files, they enter the pending state. Volumes remain in the pending state for as long as specified with the REUSEDELAY parameter for the storage pool to which the volume belongs. Server internals will take care of finally deleting the Pending Volume from the storage pool when its time is up.
Delaying reuse of volumes can be helpful under certain conditions for disaster recovery. When TSM expires, deletes, or moves files from a volume, the files are not actually erased from the volumes: the database references to these files are removed. Thus the file data may still exist on sequential volumes if the volumes are not immediately reused.
If a disaster forces you to restore the TSM database using a database backup that is old or is not the most recent backup, some files may not be recoverable because TSM cannot find them on current volumes. However, the files may exist on volumes that are in pending state. You may be able to use the volumes in pending state to recover data by doing the following:
1. Restore the database to a point-in-time prior to file expiration.
2. Use a primary or copy storage pool volume that has not been rewritten and contains the expired file at the time of database backup.
If you back up your primary storage pools, set the REUSEDELAY parameter for the primary storage pools to 0 to efficiently reuse primary scratch volumes. For your copy storage pools, you should delay reuse of volumes for as long as you keep your oldest database backup. No useful purpose is served by setting REUSEDELAY to a value dramatically larger than the Retention period for Database backups.
Volumes in a storage pool with a non-zero REUSEDELAY may not remain in the storage pool for the REUSEDELAY period if access is set to destroyed. If REUSEDELAY is set to zero (zero is the default), this problem does not apply. Volumes which are in a destroyed state will be immediately deleted from the storage pool and set to scratch once they have been restored or deleted. Try to avoid updating a volume's access to DESTROYED, use UNAVAILABLE instead.
The TSM database retention period is specified using the SET DRMDBBACKUPEXPIREDAYS. By specifying this value to the REUSEDELAY period in the copy pool definition ensures that the database can be restored to an earlier level and database references to files in the storage pool are still valid.
For the PDF version of this document, send a blank email, with subject line "Delaying the Re-use of Sequential Access Volumes", to TSM Assist
Thursday, April 16, 2009
Define a RAW volume to TSM
One of the main advantages of disk pools is the timing of send high loads to your tape drives.
Within TSM, there are three types of disk pools: Random Access Disk Pools (of device class DISK), File Disk Pools (of device class FILE) – files on hard drives that store data sequentially as on tape, and RAW Disk Pools.
The 3 types differ in the use and the performance you can reach. Best performance for large file migrations is found in RAW volumes. Random access disk pools are best for small files. In the middle, we find file disk pools which have the advantage of sequential read and write operations which make it better than random access disk pools.
The size of each volume within a disk pool seems to be very important within TSM. To improve performance, reduce the size of and increase the count of the volumes. Furthermore, and only on random access volumes, a single corrupt volume can be taken varied to offline without halting operations to the entire storage pool.
To define a RAW volume to TSM, follow these steps:
3. Define as a TSM database volume:
def dbv /dev/rls_name
4. Define as a TSM log volume:
def logv /dev/rls_name
For the PDF version of this document, send a blank email, with subject line "Define a RAW volume to TSM", to TSM Assist
Within TSM, there are three types of disk pools: Random Access Disk Pools (of device class DISK), File Disk Pools (of device class FILE) – files on hard drives that store data sequentially as on tape, and RAW Disk Pools.
The 3 types differ in the use and the performance you can reach. Best performance for large file migrations is found in RAW volumes. Random access disk pools are best for small files. In the middle, we find file disk pools which have the advantage of sequential read and write operations which make it better than random access disk pools.
The size of each volume within a disk pool seems to be very important within TSM. To improve performance, reduce the size of and increase the count of the volumes. Furthermore, and only on random access volumes, a single corrupt volume can be taken varied to offline without halting operations to the entire storage pool.
To define a RAW volume to TSM, follow these steps:
1. Prepare a raw volume using Operating System commands; raw volume ls_name and platform AIX is used here.
2. Define to a storage pool:
def v stgp_name /dev/rls_name [ /code ]
2. Define to a storage pool:
def v stgp_name /dev/rls_name [ /code ]
3. Define as a TSM database volume:
def dbv /dev/rls_name
4. Define as a TSM log volume:
def logv /dev/rls_name
For the PDF version of this document, send a blank email, with subject line "Define a RAW volume to TSM", to TSM Assist
Monday, April 13, 2009
TSM Server-Side Daily Administrator Checklist
1. List TSM license compliance.
audit lic
select compliance from licenses
2. Query server processes and pending requests to determine if any jobs are waiting on operator action.
q pr
q req
q se
3. Query all disk storage pools to determine if the migration process has completed.
select stgpool_name, pct_utilized from stgpools where devclass='DISK'
4. List all drives that are OFFLINE.
select drive_name from drives where not online='YES'
5. List all paths that are OFFLINE.
select source_name, source_type, destination_name, destination_type from paths where not online='YES'
6. List all locked nodes.
select node_name from nodes where not locked='NO'
7. List all non-writeable tape and disk volumes.
q v acc=unavail
q v acc=reado
q v acc=destroyed
select volume_name, read_errors, write_errors from volumes where (read_errors>0 or write_errors>0)
select volume_name from volumes where devclass_name='DISK' and not status='ONLINE'
8. Verify that the library has sufficient scratch volumes.
select library_name,status,count(*) as "VOLUMES" from libvolumes group by library_name,status
9. Verify that the database extension and reduction values are non-zero and that the Cache Hit Ration is above 99%.
q db f=d
10. Verify that the recovery log extension and reduction values are non-zero and that the Wait Percentage is zero.
q log f=d
11. Verify that database and recovery log volumes are online and synchronized.
q dbv f=d
q logv f=d
12. Inspect TSM database fragmentation level.
select cast((100 - (cast(max_reduction_mb as float) * 256 ) / (cast(usable_pages as float) - cast(used_pages as float) ) * 100) as decimal(4,2)) as PERCENT_FRAG from db
13. Verify that the scheduled database backups completed successfully.
select date (date_time) as date, time(date_time) as time, volume_name, type from volhistory where type in ('BACKUPFULL', 'BACKUPINCR', 'DBSNAPSHOT', 'DBDUMP')
14. Verify that all CLIENT schedules for the last day succeeded.
q ev * * begind=-1 endd=today begint=00:00:00 endt=00:00:00
To restrict the listing to only those nodes with non-completed status:
q ev * * begind=-1 endd=today begint=00:00:00 endt=00:00:00 ex=y
15. Verify that all ADMINISTRATIVE schedules for the last day succeeded.
q ev * t=a begind=-1 endd=today begint=00:00:00 endt=00:00:00
To restrict the listing to only those nodes with non-completed status:
q ev * t=a begind=-1 endd=today begint=00:00:00 endt=00:00:00 ex=y
16. Check the activity log for error messages.
q actl search=AN?????E begind=-1 begint=00:00 endd=today endt=00:00
17. Open files and other missed filed will often not have the schedule name in activity log error messages. This query will list these files:
select nodename,date_time,message from actlog where (date_time>currenttimestamp-1 day) and msgno in (4005,4007,4018,4037,4046,4047,4987,4973,4034,4042)
18. List nodes that are not associated with a backup schedule.
select node_name from nodes where node_name not in (select node_name from associations)
19. Cross match the TSM node name with the host name or computer name.
select node_name, tcp_address, tcp_name from nodes
20. List PRIMARY POOL volumes that have been checked out of the library.
select volume_name, stgpool_name from volumes where stgpool_name in (select stgpool_name from stgpools where devclass<>'DISK' and pooltype='PRIMARY') and volume_name not in (select volume_name from libvolumes)
21. Checkout all D/R Media for offsite storage.
move drm * wherest=mo tost=va rem=b
22. Verify that all D/R volumes have been checked out.
select volume_name from libvolumes where volume_name in (select volume_name from volumes where stgpool_name in (select stgpool_name from stgpools where devclass<>'DISK' and pooltype='COPY'))
23. Verify that all TSM database backup volumes have been checked out.
select volume_name from libvolumes where last_use='DbBackup'
24. Identify previous offsite volumes that can be recycled to scratch status and checkin the same.
q drm wherest=vaultr
move drm * wherest=vaultr tost=onsite
checki libvcheckl=b stat=scr search=b wait=0
25. Generate a list of unlocked TSM administrator accounts with full system privileges.
select admin_name from admins where not system_priv='No' and not locked='No'
26. List TSM Nodes and Client (BA/TDP) versions by platform.
select platform_name as OS, client_os_level as OS_VER, node_name as Node, cast(cast(client_version as char(2)) '.' cast(client_release as char(2)) '.' cast(client_level as char(2)) '.' cast(client_sublevel as char(2)) as char(15)) as "TSM Client" from nodes order by platform_name, "TSM Client", Node
27. Data backed up in the last 24 hours:
select entity, date(start_time) as DATE, time(start_time) as START_TIME, time(end_time) as END_TIME, substr(char(end_time-start_time),3,8) as DURATION, cast((bytes/1024/1024/1024) as decimal(18,2)) as GB_BACKED_UP, successful from summary where cast((current_timestamp-start_time) hours as decimal)<24>=current_timestamp-24 hours and activity='BACKUP' group by entity
28. Size and duration of archive operations for each node in the last 24 hours:
select entity as "Node Name ", cast(sum(bytes/1024/1024) as decimal(10,3)) as "Total MB", substr(cast(min(start_time) as char(26)),1,19) as "Date/Time ", cast(substr(cast(max(end_time)-min(start_time) as char(20)),3,8) as char(8)) as "Length " from summary where start_time>=current_timestamp-24 hours and activity='ARCHIVE' group by entity
29. Compare PRIMARY and COPY pool occupancy totals.
select sum(num_files) as num_of_files,sum(physical_mb) as Physical_mb,sum(logical_mb) as logical_mb from occupancy where stgpool_name in (select stgpool_name from stgpools where pooltype='PRIMARY')
select sum(num_files) as num_of_files,sum(physical_mb) as Physical_mb,sum(logical_mb) as logical_mb from occupancy where stgpool_name in (select stgpool_name from stgpools where pooltype='COPY')
For the PDF version of this document, send a blank email, with subject line "TSM Server-Side Daily Admistrator Checklist", to TSM Assist
audit lic
select compliance from licenses
2. Query server processes and pending requests to determine if any jobs are waiting on operator action.
q pr
q req
q se
3. Query all disk storage pools to determine if the migration process has completed.
select stgpool_name, pct_utilized from stgpools where devclass='DISK'
4. List all drives that are OFFLINE.
select drive_name from drives where not online='YES'
5. List all paths that are OFFLINE.
select source_name, source_type, destination_name, destination_type from paths where not online='YES'
6. List all locked nodes.
select node_name from nodes where not locked='NO'
7. List all non-writeable tape and disk volumes.
q v acc=unavail
q v acc=reado
q v acc=destroyed
select volume_name, read_errors, write_errors from volumes where (read_errors>0 or write_errors>0)
select volume_name from volumes where devclass_name='DISK' and not status='ONLINE'
8. Verify that the library has sufficient scratch volumes.
select library_name,status,count(*) as "VOLUMES" from libvolumes group by library_name,status
9. Verify that the database extension and reduction values are non-zero and that the Cache Hit Ration is above 99%.
q db f=d
10. Verify that the recovery log extension and reduction values are non-zero and that the Wait Percentage is zero.
q log f=d
11. Verify that database and recovery log volumes are online and synchronized.
q dbv f=d
q logv f=d
12. Inspect TSM database fragmentation level.
select cast((100 - (cast(max_reduction_mb as float) * 256 ) / (cast(usable_pages as float) - cast(used_pages as float) ) * 100) as decimal(4,2)) as PERCENT_FRAG from db
13. Verify that the scheduled database backups completed successfully.
select date (date_time) as date, time(date_time) as time, volume_name, type from volhistory where type in ('BACKUPFULL', 'BACKUPINCR', 'DBSNAPSHOT', 'DBDUMP')
14. Verify that all CLIENT schedules for the last day succeeded.
q ev * * begind=-1 endd=today begint=00:00:00 endt=00:00:00
To restrict the listing to only those nodes with non-completed status:
q ev * * begind=-1 endd=today begint=00:00:00 endt=00:00:00 ex=y
15. Verify that all ADMINISTRATIVE schedules for the last day succeeded.
q ev * t=a begind=-1 endd=today begint=00:00:00 endt=00:00:00
To restrict the listing to only those nodes with non-completed status:
q ev * t=a begind=-1 endd=today begint=00:00:00 endt=00:00:00 ex=y
16. Check the activity log for error messages.
q actl search=AN?????E begind=-1 begint=00:00 endd=today endt=00:00
17. Open files and other missed filed will often not have the schedule name in activity log error messages. This query will list these files:
select nodename,date_time,message from actlog where (date_time>currenttimestamp-1 day) and msgno in (4005,4007,4018,4037,4046,4047,4987,4973,4034,4042)
18. List nodes that are not associated with a backup schedule.
select node_name from nodes where node_name not in (select node_name from associations)
19. Cross match the TSM node name with the host name or computer name.
select node_name, tcp_address, tcp_name from nodes
20. List PRIMARY POOL volumes that have been checked out of the library.
select volume_name, stgpool_name from volumes where stgpool_name in (select stgpool_name from stgpools where devclass<>'DISK' and pooltype='PRIMARY') and volume_name not in (select volume_name from libvolumes)
21. Checkout all D/R Media for offsite storage.
move drm * wherest=mo tost=va rem=b
22. Verify that all D/R volumes have been checked out.
select volume_name from libvolumes where volume_name in (select volume_name from volumes where stgpool_name in (select stgpool_name from stgpools where devclass<>'DISK' and pooltype='COPY'))
23. Verify that all TSM database backup volumes have been checked out.
select volume_name from libvolumes where last_use='DbBackup'
24. Identify previous offsite volumes that can be recycled to scratch status and checkin the same.
q drm wherest=vaultr
move drm * wherest=vaultr tost=onsite
checki libv
25. Generate a list of unlocked TSM administrator accounts with full system privileges.
select admin_name from admins where not system_priv='No' and not locked='No'
26. List TSM Nodes and Client (BA/TDP) versions by platform.
select platform_name as OS, client_os_level as OS_VER, node_name as Node, cast(cast(client_version as char(2)) '.' cast(client_release as char(2)) '.' cast(client_level as char(2)) '.' cast(client_sublevel as char(2)) as char(15)) as "TSM Client" from nodes order by platform_name, "TSM Client", Node
27. Data backed up in the last 24 hours:
select entity, date(start_time) as DATE, time(start_time) as START_TIME, time(end_time) as END_TIME, substr(char(end_time-start_time),3,8) as DURATION, cast((bytes/1024/1024/1024) as decimal(18,2)) as GB_BACKED_UP, successful from summary where cast((current_timestamp-start_time) hours as decimal)<24>=current_timestamp-24 hours and activity='BACKUP' group by entity
28. Size and duration of archive operations for each node in the last 24 hours:
select entity as "Node Name ", cast(sum(bytes/1024/1024) as decimal(10,3)) as "Total MB", substr(cast(min(start_time) as char(26)),1,19) as "Date/Time ", cast(substr(cast(max(end_time)-min(start_time) as char(20)),3,8) as char(8)) as "Length " from summary where start_time>=current_timestamp-24 hours and activity='ARCHIVE' group by entity
29. Compare PRIMARY and COPY pool occupancy totals.
select sum(num_files) as num_of_files,sum(physical_mb) as Physical_mb,sum(logical_mb) as logical_mb from occupancy where stgpool_name in (select stgpool_name from stgpools where pooltype='PRIMARY')
select sum(num_files) as num_of_files,sum(physical_mb) as Physical_mb,sum(logical_mb) as logical_mb from occupancy where stgpool_name in (select stgpool_name from stgpools where pooltype='COPY')
For the PDF version of this document, send a blank email, with subject line "TSM Server-Side Daily Admistrator Checklist", to TSM Assist
Running a TSM Library Audit
The AUDIT LIBR command synchronizes the TSM server’s library volume inventory with volumes that are physically located in an automated library. If TSM detects inconsistencies, it updates it inventory to reflect the current state of the library: missing volumes are removed from the server inventory list (q libv). The server does not automatically add new volumes; you must check in new volumes with the CHECKIN LIBVOLUME command.
When running a library audit, it is usually a good idea that the library is inactive:
1. Use the DISABLE SE command to prevent starting new client node sessions.
2. Use the QUERY SE command to identify any existing administrative and client node sessions.
3. Use the CANCEL SE command to cancel any existing administrative or client node sessions.
4. Use the Q PR command to identify active background processes.
5. Use the CANCEL PR command to cancel any active background processes.
6. Use the Q MO command to identify the status of any mounted tape volumes.
7. Use the DISMOUNT VOL command to dismount idle volumes.
With the library inactive, run the AUDIT LIBR command with the switch CHECKL=b. This switch is optional, but it will make the audit run much faster. This audit involves your robot scanning the barcode labels of all tapes. If the robot cannot read the barcode label or the barcode label is missing, TSM mounts the tape to read the label.
AUDIT LIBR
The default action is to mount each tape to identify the volume. The audit runs until all tapes are dismounted.
Lastly, checkin any new volumes (first for SCRATCH volumes, then for PRIVATE volumes) that the audit process may discover:
CHECKIN LIBV
CHECKIN LIBV
End this process, by running the ENABLE SE command to enable new client node sessions.
Sunday, April 12, 2009
Halting the TSM Server
The HALT command forces an abrupt shutdown, which cancels all the administrative and client node sessions even if they are not completed. Any transactions in progress interrupted by the HALT command are rolled back when you restart the server.
Use the HALT command only after the administrative and client node sessions are completed or cancelled. To shut down the server without severely impacting administrative and client node sessions, perform the following steps:
- Use the DISABLE SE command to prevent starting new client node sessions.
- Use the QUERY SE command to identify any existing administrative and client node sessions.
- Use the CANCEL SE command to cancel any existing administrative or client node sessions.
- Use the Q PR command to identify active background processes.
- Use the CANCEL PR command to cancel any active background processes.
- Use the Q MO command to identify the status of any mounted tape volumes.
- Use the DISMOUNT VOL command to dismount idle volumes.
- With no existing administrative and client node sessions, no active background processes and no mounted volumes, run the HALT command to shut down the TSM server.
For the PDF version of this document, send a blank email, with subject line "Halting the TSM Server", to TSM Assist
Subscribe to:
Posts (Atom)

